We all like to record things – don’t we?
However, when it comes to computer systems, particularly MAC, recording the screen can seem like a complicated undertaking, especially if you are using a MAC for the first time. Thankfully, there are a lot of ways and tools through which you can screen record on MAC. The following guide covers how users can record their MAC screens:
With the Screenshot Toolbar
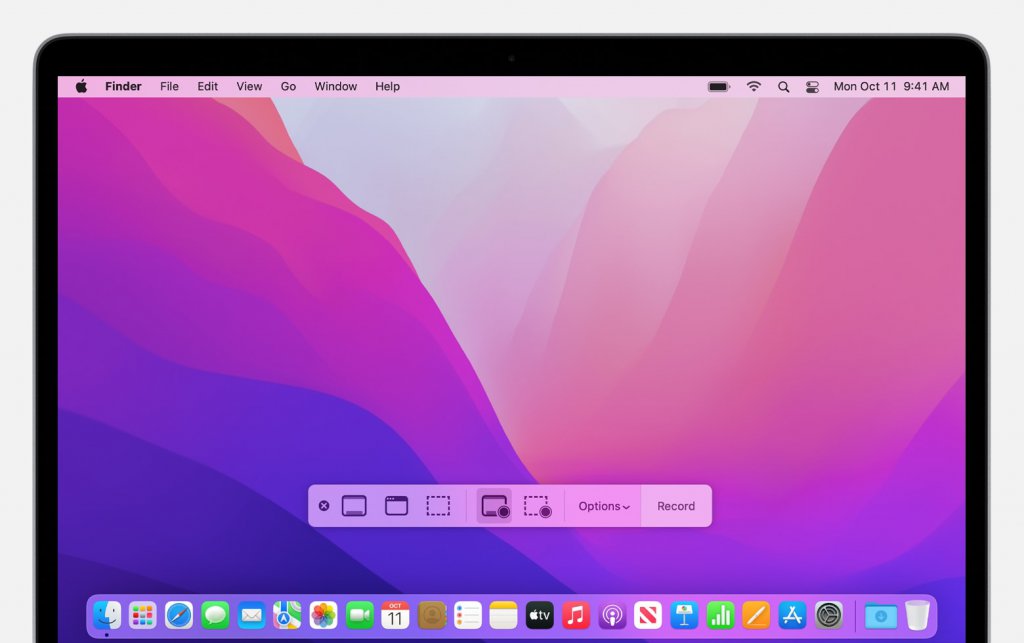
Here’s how you can screen record on Mac through the screenshot toolbar:
- To use the Screenshot Toolbar, use the keyboard shortcuts Command + Shift + 5. At the bottom of the screen, a toolbar with numerous icons and settings will emerge. The symbols with the recording symbol (a complete circle) over them are what you’re looking for. In one, your full screen will be captured on video, while in the other, you can choose only a portion of your screen to record.
- Select the recording type that you want, select the area of your screen that you want to record, and then click “Record.” Then, press the Esc key to stop a screen recording before it starts.
- Your recording will begin immediately and record anything that appears on your screen (or in the designated area) as well as any audio that is currently playing. When finished, select “stop” from the menu bar at the top of your screen.
- Your screen captures will be saved as.mov files on the desktop. Open the Screenshot Toolbar and select “Options” to modify this.
With the QuickTime Player
Here’s how you can screen record on Mac through the QuickTime player:
- Open QuickTime Player by selecting it from your Applications folder, then select File > New Screen Recording in the menu bar.
- Take the actions listed above if you see the onscreen controls.
- Take the actions listed below if the Screen Recording window appears.
- To modify the recording parameters before beginning your recording, click the arrow beside the Record button:
- Pick a microphone if you want to record your audio with the screen recording. You can modify the volume slider to listen to that audio while you’re recording. Reduce the level or use headphones through a microphone if you hear auditory feedback.
- Select Show Mouse Clicks in Recording to display a black circle near your pointer when you click.
- Click the Record button to begin recording, and then do one of the following:
- To start recording the entire screen, click anywhere on the display.
- You can drag to choose a recording region, then inside that area click Start Recording.
- To stop recording, press Command-Control-Esc or click the Stop option in the menu bar (Escape). 6. QuickTime Player launches the recording immediately after you finish recording. The recording can now be played, edited, or shared.
Screen Recording With External Applications
The wonderful thing about screen recording on a Mac is that you’re not limited to the built-in tools. You may record your screen using a variety of third-party tools, some of which even let you add narration.
- Screen Recorder by Apowersoft
Free and simple to use, Apowersoft Screen Recorder. Since it is a browser-based program, you may record your screen indefinitely without needing to download anything.
- Snagit
Snagit is the ideal option if you’re going to make an educational video. In addition to letting you record everything on your screen, it also lets you add images when editing your movies to make them more engaging.
- Loom
Loom is a desktop app that allows users to capture both audio and video.


